How to convert CD to 320kbps MP3?
MPEG-1 Audio Layer 3, more commonly referred to as MP3, is a patented digital audio encoding format using a form of lossy data compression. It is a common audio format for consumer audio storage, as well as a de facto standard of digital audio compression for the transfer and playback of music on digital audio players.
The use in MP3 of a lossy compression algorithm is designed to greatly reduce the amount of data required to represent the audio recording and still sound like a faithful reproduction of the original uncompressed audio for most listeners. An MP3 file that is created using the setting of 128 kbit/s will result in a file that is about 11 times smaller than the CD file created from the original audio source. An MP3 file can also be constructed at higher or lower bit rates, with higher or lower resulting quality.
MP3 320 kbps will sound almost as good as CD quality. So it is considered a better format choice as it provides almost pristine audio quality, high compatibility across system and devices as well as much smaller spaces. If you have larger storage device like hard disk drives, then I would recommend to enjoy the sound quality with 320 kbps MP3 files. Then how to create 320kbps from various audio and video files? It will be greatly easy by the help of Xilisoft Audio Converter Pro. With this program, you can convert audio formats including MP3, WMA, WAV, AAC, FLAC, OGG, APE to 320kbps MP3, extract audio from video and HD-video files including AVI, MPEG, WMV, MP4, FLV, MKV, H.264/MPEG-4 AVC, AVCHD and convert to 320kbps MP3, convert audio CD to MP3 at 320kbps.
This article will show you how to convert CD to 320kbps MP3 with Xilisoft Audio Converter Pro.
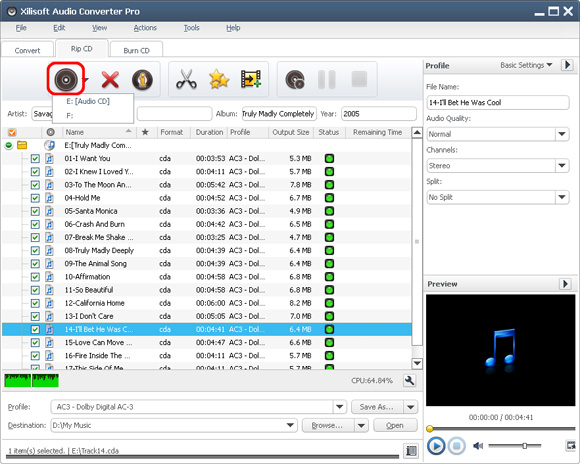
Step 1. Load audio CD
Click "Load Audio CD" Button in the tool bar and load the CD you inserted.
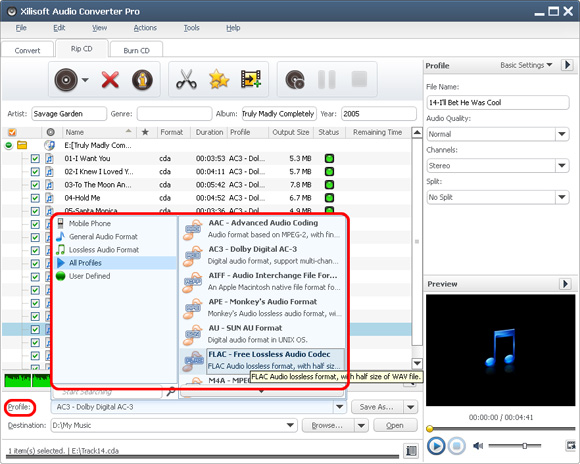
Step 2. Set output profiles
Select a file in the list and click Profile drop-down button to choose the wanted output profile in the “Profile” drop-down list that opens, such as “AC3 – Dolby Digital AC - 3”.
Step 3. Set 320 kbps bitrate
Open “Advanced Profile Settings” in the right panel, and set the “Bitrate” to 320K.
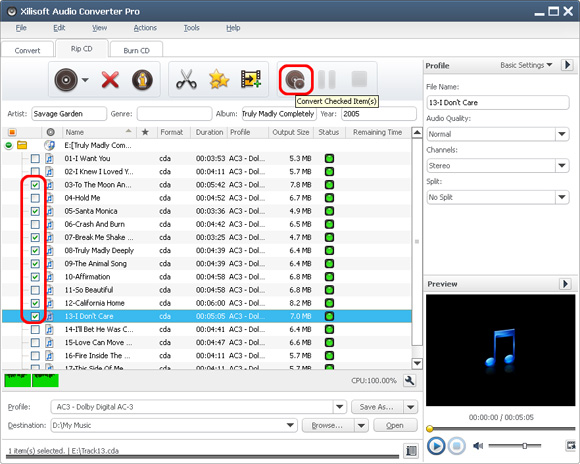
Step 4. Start converting
Check the wanted files in the file list and click “Convert Checked Item(s)” button to start the converting. You can check the converting progress by the Status bar on the bottom.
During converting, click “Pause Checked Item(s)” button to make the converting pause; click “Stop Checked Item(s)” button to stop the converting. After converting, click “Open” button to open the destination folder.


