Xilisoft iPhone Transfer for Mac Tutorial
Xilisoft iPhone Transfer for Mac makes it possible and easy to transfer files from iPhone to Mac/iTunes and Mac to iPhone. This tutorial is to show you how to transfer and manage iPhone files with Xilisoft iPhone Transfer for Mac step by step.
Firstly, please download, install and run Xilisoft iPhone Transfer for Mac, and make sure you have iTunes 7.4 or above version installed.
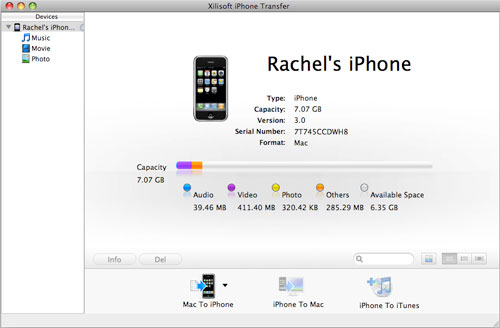
Secondly, connect your iPhone to PC via USB cable. The software will automatically detect the iPhone and show its device info on the right window.
To be clear, we divide this guide into 4 parts as below. Choose what you want to do as required:
1. Transfer files from Mac to iPhone2. Backup iPhone files to Mac3. Copy iPhone files to iTunes library4. iPhone management skills
Part 1: Transfer files from Mac to iPhone
Step 1: Locate the library/playlist in which you want to add files.
Step 2: Click the "Mac to iPhone" button, and choose the "Add Files to List..." option from the drop-down list, then select the required files in the dialog that opens and start to transfer them to iPhone.
Or, if you want to add all the files in a folder, please click the "Mac to iPhone" button and choose the "Add Folder to List..." option, and then locate the folder you want and transfer all the files in it to your iPhone.

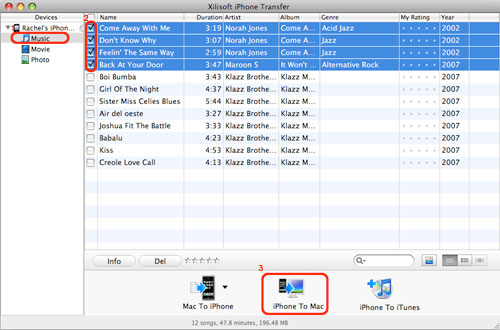
Part 2: Backup iPhone files to Mac
Step 1: Locate the library/playlist in which you want to export files.
Step 2: Check the files you want to backup in the file list.
Step 3: Click the "iPhone to Mac" button to select the target folder for saving iPhone files in the dialog that appears, and then start to transfer iPhone contents to your Mac.
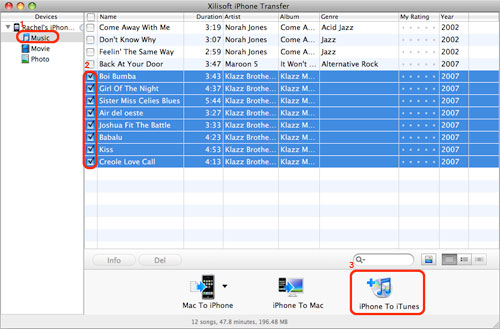
Part 3: Copy iPhone files to iTunes library
Step 1: Locate the library/playlist in which you want to export files.
Step 2: Check the files you want to copy to iTunes in the file list.
Step 3: Click the "iPhone to iTunes" button to start exporting these checked files to iTunes library.
Part 4: iPhone management skills
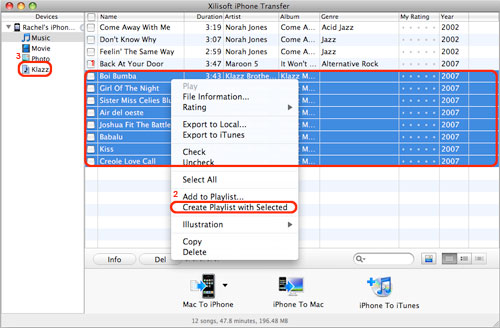
1. Create and manage iPhone playlist
Step 1: Select the music files you want to add to the playlist in the music library.
Step 2: Right click the selected files, and choose "Create Playlist with Selected" option from the right-click menu that appears, then a new playlist is created.
Step 3: Right click the newly added playlist and choose "Rename" option from the right-click menu, then enter a name as the playlist name.
Tips:
1. You can also create a playlist by clicking "File -> Playlist" option and choosing "New Playlist" option from the submenu or right clicking any library and choosing "New Playlist" option from the right-click menu.
2. Choose the playlist you created, and click "Mac to iPhone" button to add files to your playlist.
2. Locate the file quickly in two ways
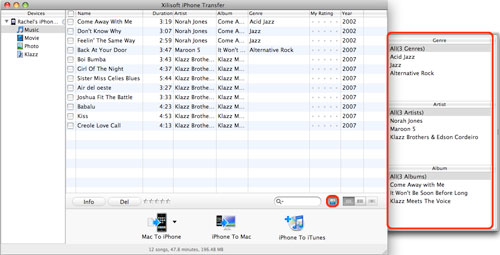
1) Click the "Quickly browse your iPhone library" button, and you can find that the files sorted by genre, artist, and album from the pop-up window.
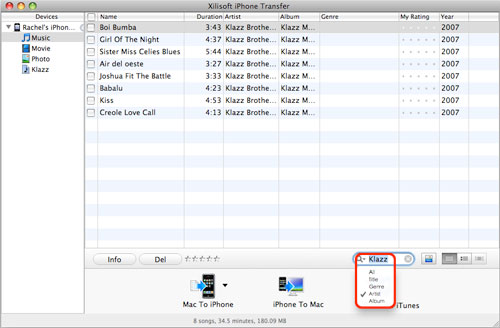
2) Click the "Quick search of item, artist, and album" button, choose the "Name" option and input what you want to search in the textbox.
3. View files in two modes
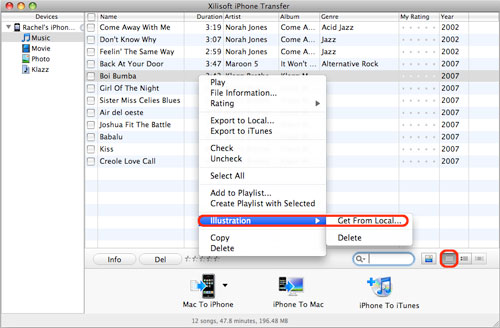
Click the "View in List" button to view files in list mode.
Click the "View in Illustration" button to view files in illustration mode.
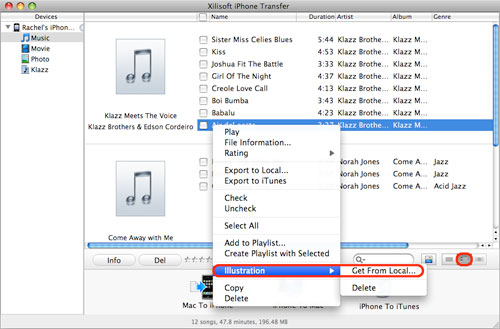
Tip: To add an illustration for a file, right click the file and click "Illustration > Get from Local..." option to choose a picture as the illustration in the dialog that opens.
4. Open iPhone with Finder
Click "File -> Open with Finder", then your iPhone will be opened with Finder, you can view all the files in the Finder and use your iPhone as a portable hard disk now.


